


Summer is here! If you’re a mama like me, garage sales {and Facebook Market} become one of the highlights of the summer. DYI projects for the house become a priority for me. Over the last few months, I had been eyeing a new dining room table. This probably came from watching too much of HGTV’s, Fixer Upper, and feeling inspired by home designer, Joanna Gaines. So, as I scanned Pinterest looking for DIY ideas, this beautiful shabby chic table graced my timeline.
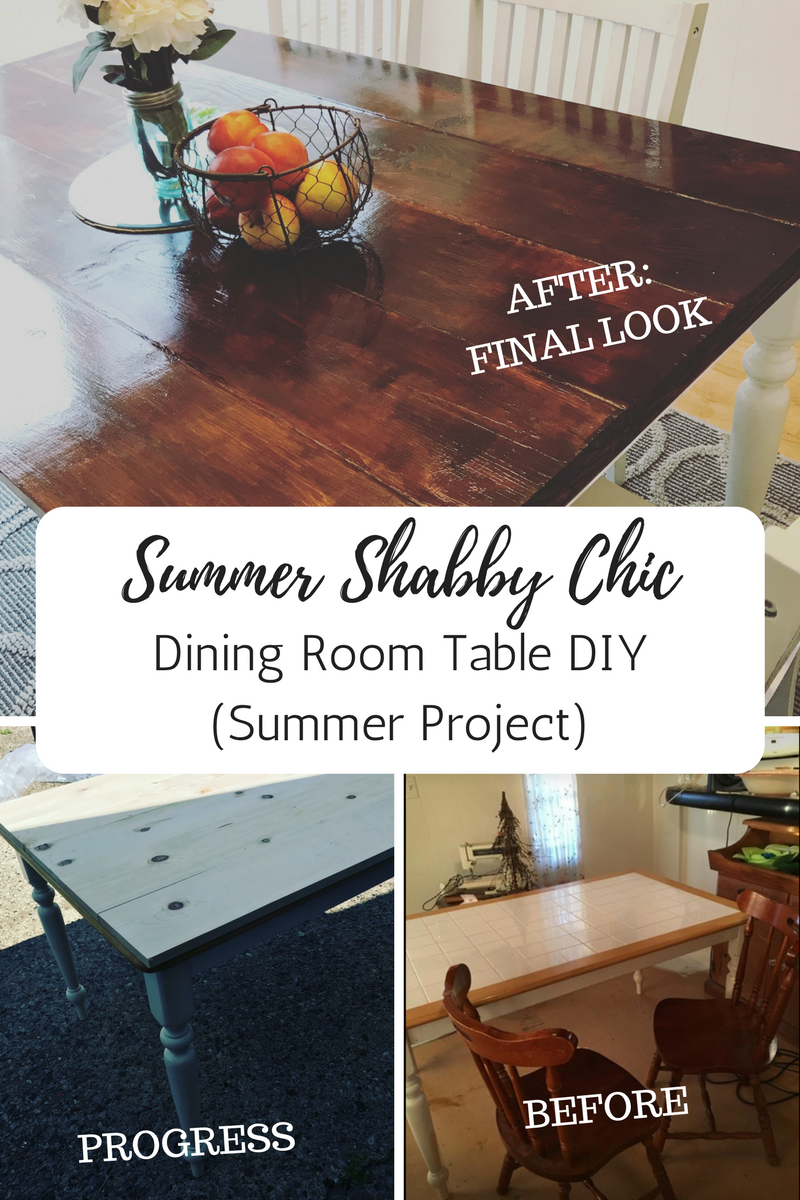
 When I found the table that inspired the look I wanted, I also found a handy dandy blog post that had detailed instructions on how to make it. I was too excited as I started searching for the used furniture pieces via Facebook Market {Genesee Surrounding Areas} and Craigslist. The table I found on Facebook Marketplace was $25. The table is exactly like the one above at the bottom. The table’s tiled surfaced would be the base for the wood planks that would complete the look. I also ended up finding six wooden chairs for $30. So, with my new items found, it was time to get rid of my old dining set {which was thrifted 7 years ago}. I posted my old piece on Facebook Marketplace and it sold within hours for $50! Talk about winning. Your girl was so winning!
So, now it was time to make my new table. I went to my local Home Depot to grab all the items that I would need:
SUPPLIES:
- 5 Wood Panels cut to the dimensions of your table
- Gorilla Glue {used on the majority of the table where we were gluing wood to the tile}
- Elmer’s ProBond Wood Filler, Stainable
- Sander or Sand paper {120 grit}
- Stain {I used MINIWAX POLY SHADE}
- Trim tape
- Paint brush
- BEHR Hi-Gloss Paint 1 QT
After collecting all my materials, I repainted the table’s legs and base with a fresh white. I then started sanding my table top with my electric sander. I grabbed my wooden panels and added a hefty amount of Gorilla Glue {don’t be shy} and aligned them on my table top’s surface. I let that dry for 24 hours before I sanded the table top again. Next, I sealed any cracks in between my wooden panels with wood filler and let that dry for about 6 hours before starting the staining process. I stained the table twice and let it dry in between coats for 24 hours. I absolutely adore my results and already have two other DIY projects planned for my summer. Us Mamas get it done, baby!

")


