


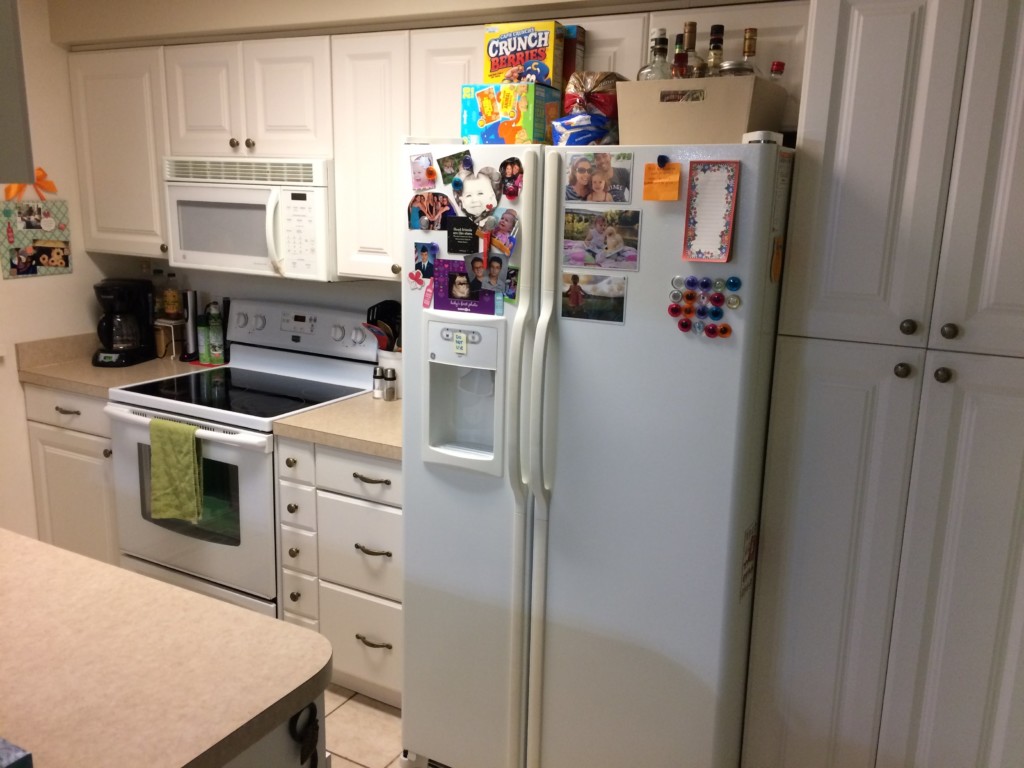
Let’s face it, not every starter home comes with a gourmet kitchen that boasts all the trendy, high-end bells and whistles. Ours is cozy {read small}, functional, and easy to clean {bonus!}. We dismissed the idea of a major renovation early on because it didn’t really need any critical repairs. Then, about four years after we moved in, the dishwasher stopped working. Easy enough, we have capable hands! Another year went by before the refrigerator stopped keeping things cold. Oh, the joys of home ownership! There is always something, am I right!? It was time to budget for that upgrade after all.
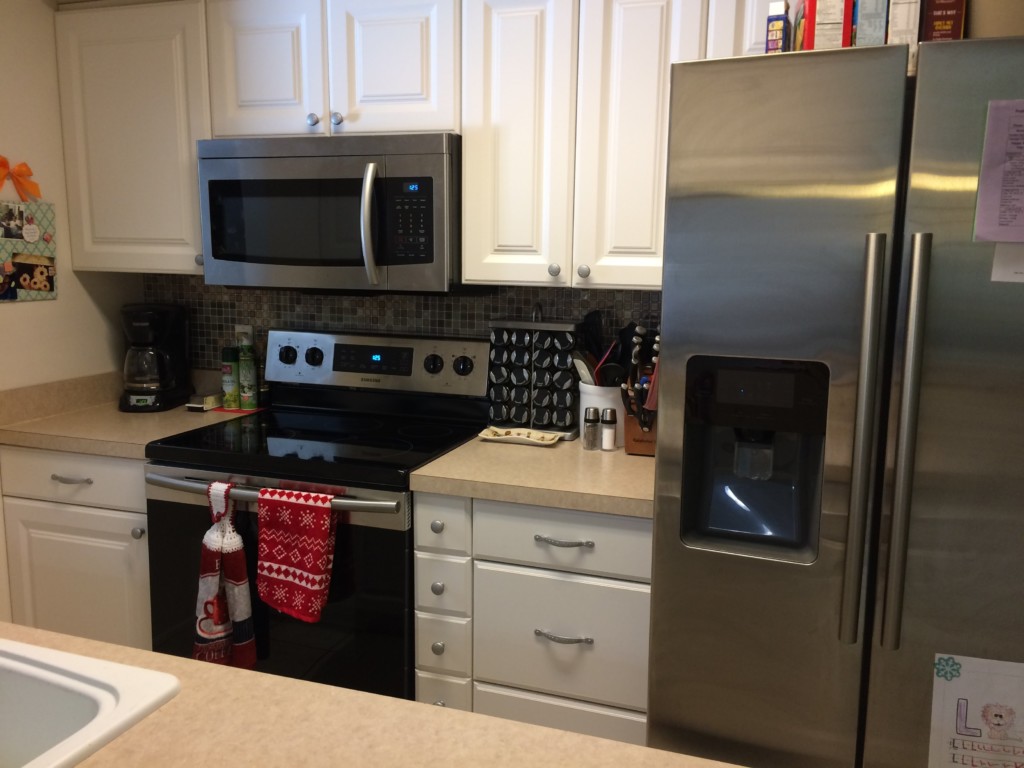
We got lucky with some well-timed Black Friday sales and scored a good deal on a matching set of new appliances. We sold our gently used microwave and stove on the Facebook marketplace and welcomed their replacements. Ahhhh, stainless-steel beauties! Yikes, our gold cupboard handles were suddenly an eyesore! And our non-existent backsplash didn’t really create the desired look for our new, more mature kitchen. I needed to do something without spending a ton of time and money. Because life!
The budget-friendly solutions that took our space to the next level were so easy and fast that I wanted to share it with you. It’s proof that you can fancy up your kitchen without breaking the bank, you just need to get a little creative.
You’ll need:
- Peel and Stick Mosaic Tiles (Amazon)
- Scissors or a Box Cutter
- Measuring Tape
- Metallic Spray Paint (Home Depot)
- Screwdriver
The Backslash
I ordered peel and stick tiles from Amazon on a whim because I figured if they were terrible, they could just be returned. I was impressed from the start. They even have a thick, rubber-like texture and a beautiful shine. People are shocked when I tell them it’s basically just overlapping stickers in 12×12 sheets. No messy grout, no actual tile to cut. Just grab scissors or a box cutter and take your time. They are VERY sticky, so be sure you are placing each tile just as you want it because those things aren’t coming off! As my dad would say, “Measure twice, cut once!” You’ll want to start on one end of your wall and build by laying them together as the directions show. Remember to take your outlet or light switch covers off to keep it looking seamless. The backsplash looks awesome now and has held up perfectly for over a year without any peeling, discoloration or damage.
 The Handles & Drawer Pulls
 The Handles & Drawer Pulls
This couldn’t be easier! Grab a screwdriver and remove your current hardware. Set yourself up in the garage or outside if the weather is nice. We chose metallic spray paint that dried with a dull, textured nickel look. Lay the old handles and drawer pulls out on spare wood or cardboard, shake the can up and have at it! I did two coats. After a year or so, some inside edges are starting to wear and expose the gold underneath, but it doesn’t bother me because you can’t really see it!
[easy-image-collage id=17964]
These two, simple upgrades really transformed our kitchen. The same techniques could be applied in a bathroom, laundry room or even a basement bar area.
I hope you see this and are inspired to give it a try. If so, please let me know how it turns out! What other things have you done to create some simple upgrades without a major time or money commitment?
 Can’t Get Enough")


