


Let me start by saying that I LOVE all things HGTV. I could watch the Scott brothers or Joanna Gaines or any of the other personalities rehab almost anything and be completely happy.
I love dabbling in various home improvement projects however I have never undertaken any sort of reupholstering job before. So if you have any interest in reupholstering chairs or if you just love watching train wrecks, read on!
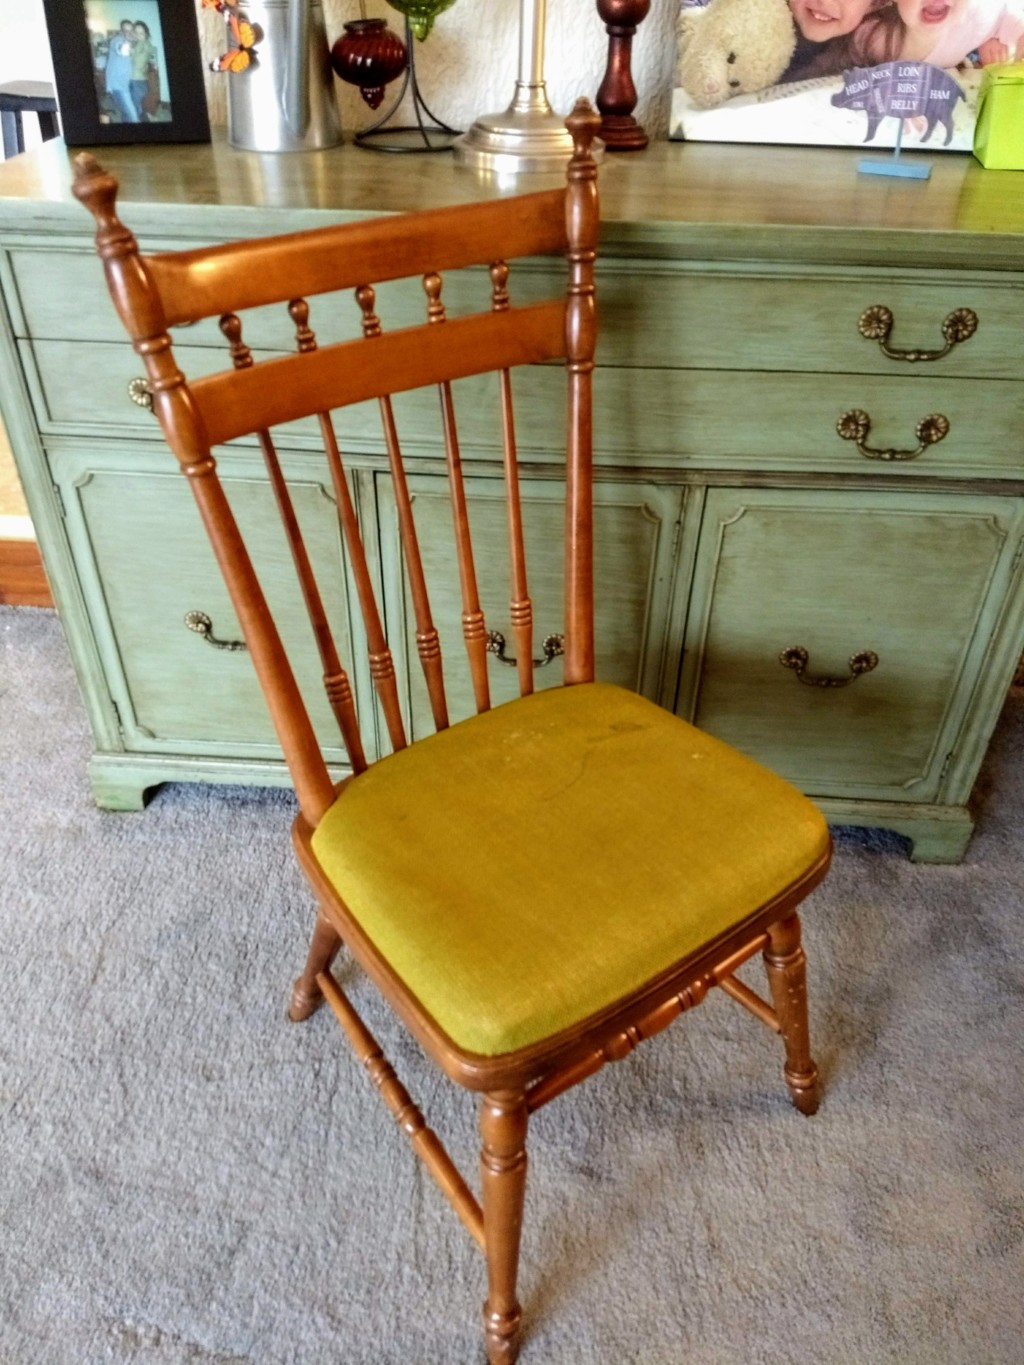
Step One: Obtain an upholstered dining room chair.
When my grandmother was downsizing her furniture many years ago, my husband and I claimed two of her dining room chairs. Here is an insider tip: If you have a chance, get ALL of your grandmother’s dining room chairs. There is always a place at the Salvation Army if you decide you don’t love them, but if you decide they are your favorite of your mismatched dining room chairs down the road, you will be sad that you didn’t get more.
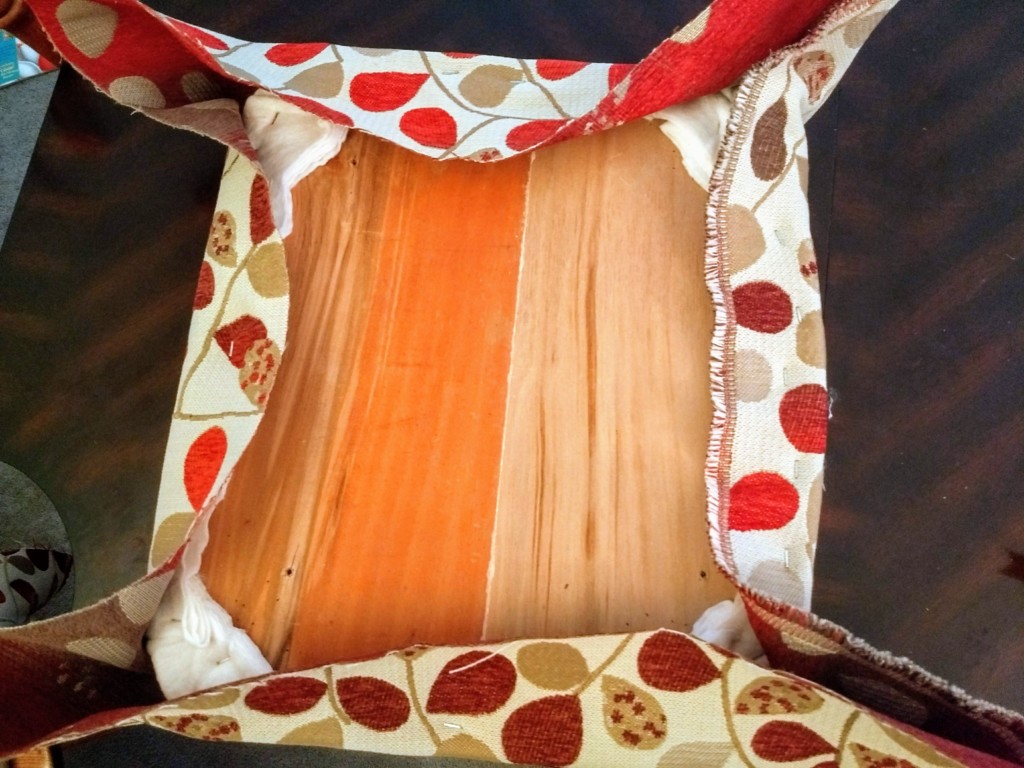
Step Two: Remove the original upholstery.
My dining chairs have four screws in the bottom to keep the upholstered seat secure. A quick dig through my tool chest brought up a large flat-head screwdriver that did the trick, and the seat was free.
Now I’m not sure exactly how old these chairs are, but something was scribbled on the bottom of one about 1966. I don’t think they had ever been reupholstered. And if this batting was ever fluffy, it was weighed down by nearly six decades of love, use, and exhaustion. {Also, you can see that our children have left their all-too-literal mark on them.}
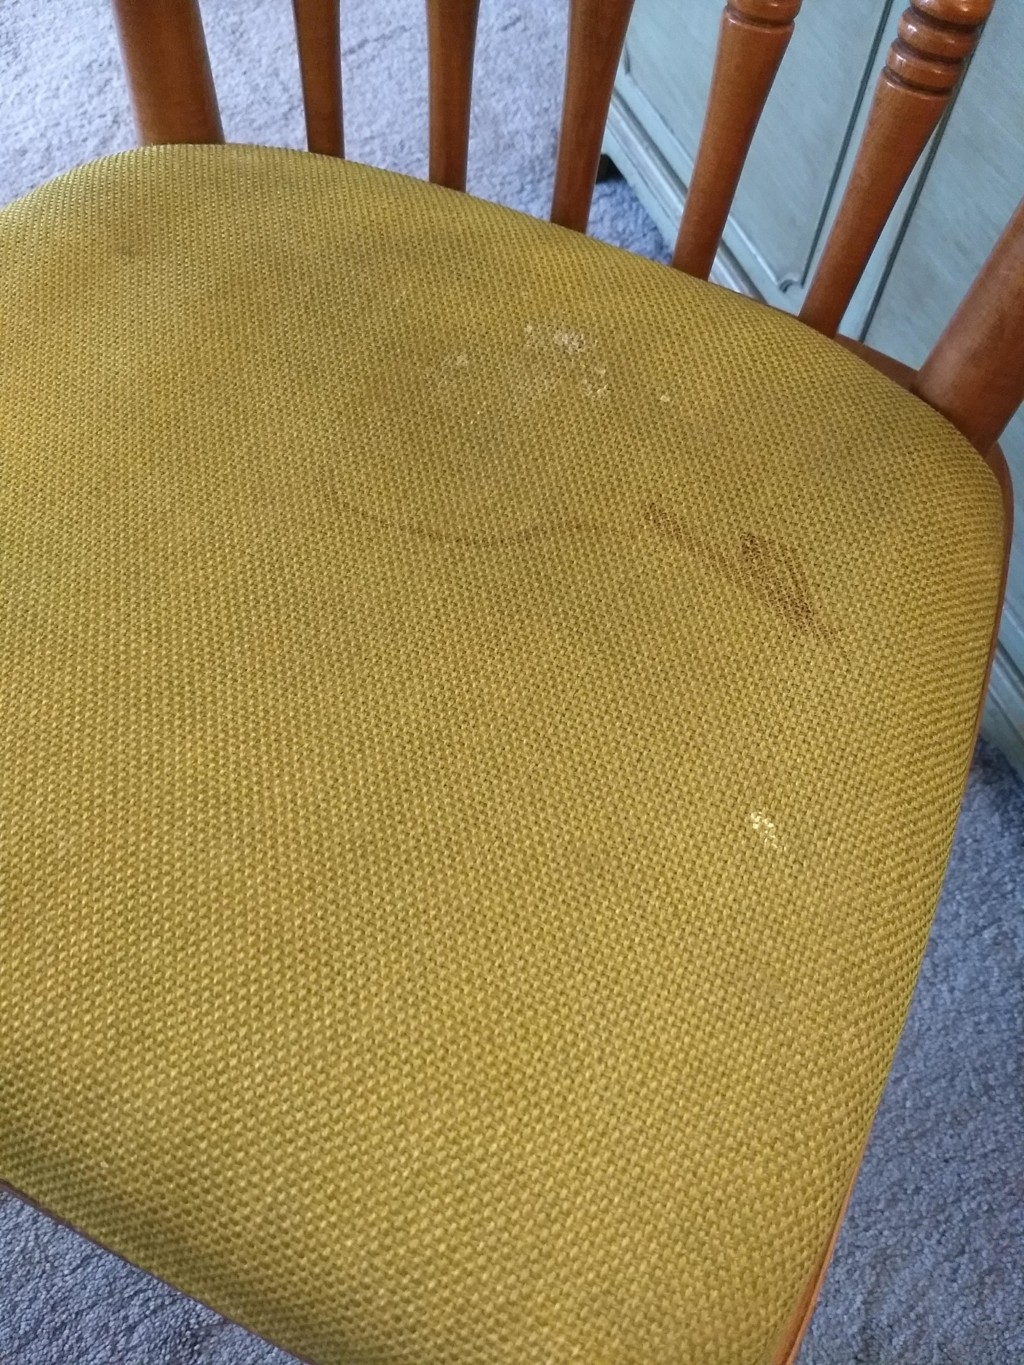
There are tools for this specific job, but I just used the same flat-head screwdriver to pry all the staples out of the bottom of the seat. The staples were antique and very rusty, so I carefully collected them and put them in a used medicine bottle before throwing them away.
Step Three: Gather your items.
For this project, I stole my husband’s staple gun, as well as quite a stash of extra staples {I went a little staple crazy. That fabric is not going anywhere!} Some tutorials online tell you to use a fancy multi-tool to remove tacks, nails, or staples, but I just used ye olde flat-head screwdriver again. Fabric scissors are also a must, for trimming the fabric and batting. For the foam I used a serrated bread knife, but that was astonishingly messy, so be ready with your vacuum.
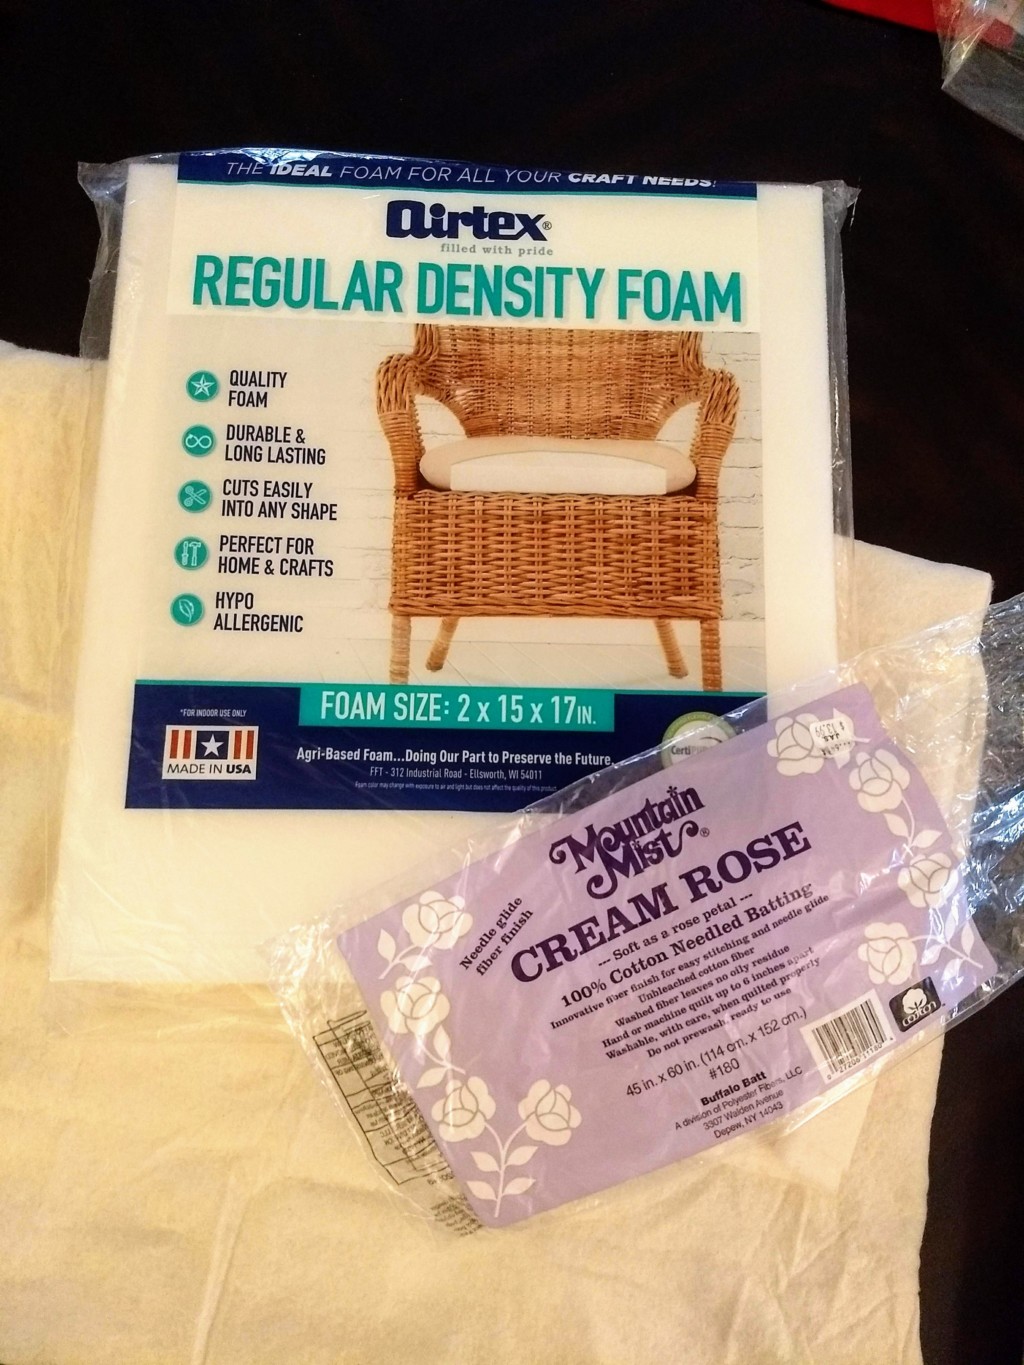
You will need replacement foam and batting if you are doing anything more than just replacing the fabric. {I didn’t think I needed the batting, but I changed my mind because it gives an extra layer of support for the fabric.} The Cream Rose might have been a little fancy for this project, but it was what I had on hand.
Step Four: Cut your foam.
Place the seat bottom on your foam and trace it. {A ball-point pen didn’t work for me, so I requisitioned a marker from my kids’ stash.}
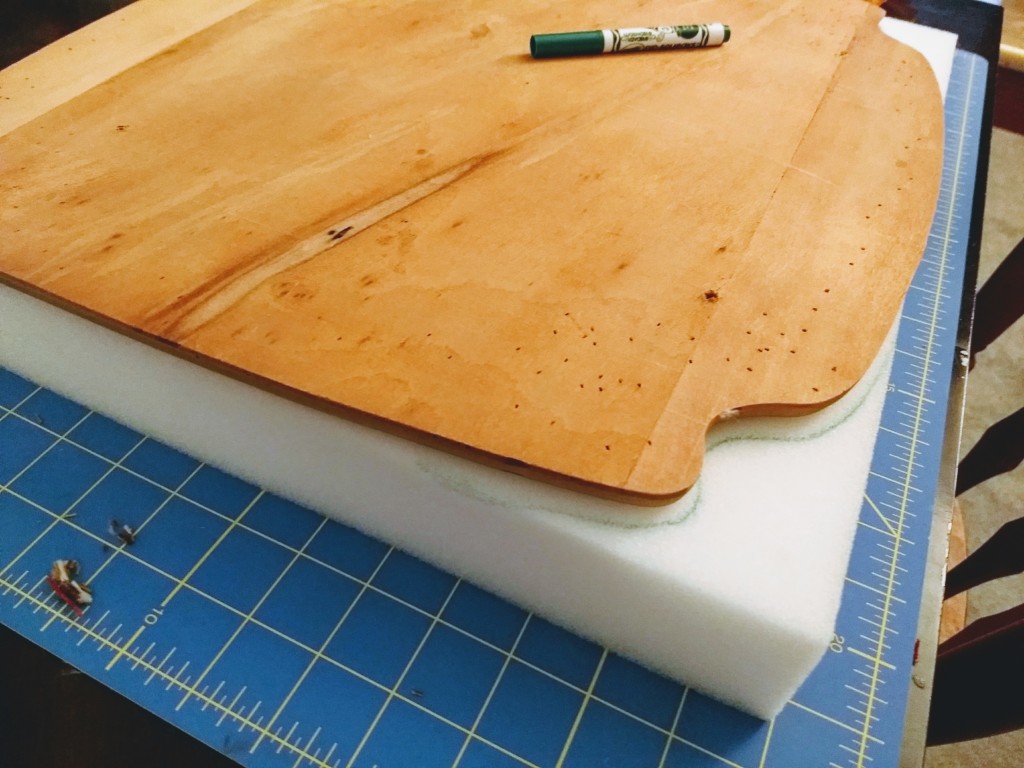
Like I said before, this part can be messy. Have your trusty vacuum handy.
Step Five: Staple the batting on over the foam.
You might want to warn anyone else who’s at home that it’s going to sound like opening day of deer season while you’re doing this part.
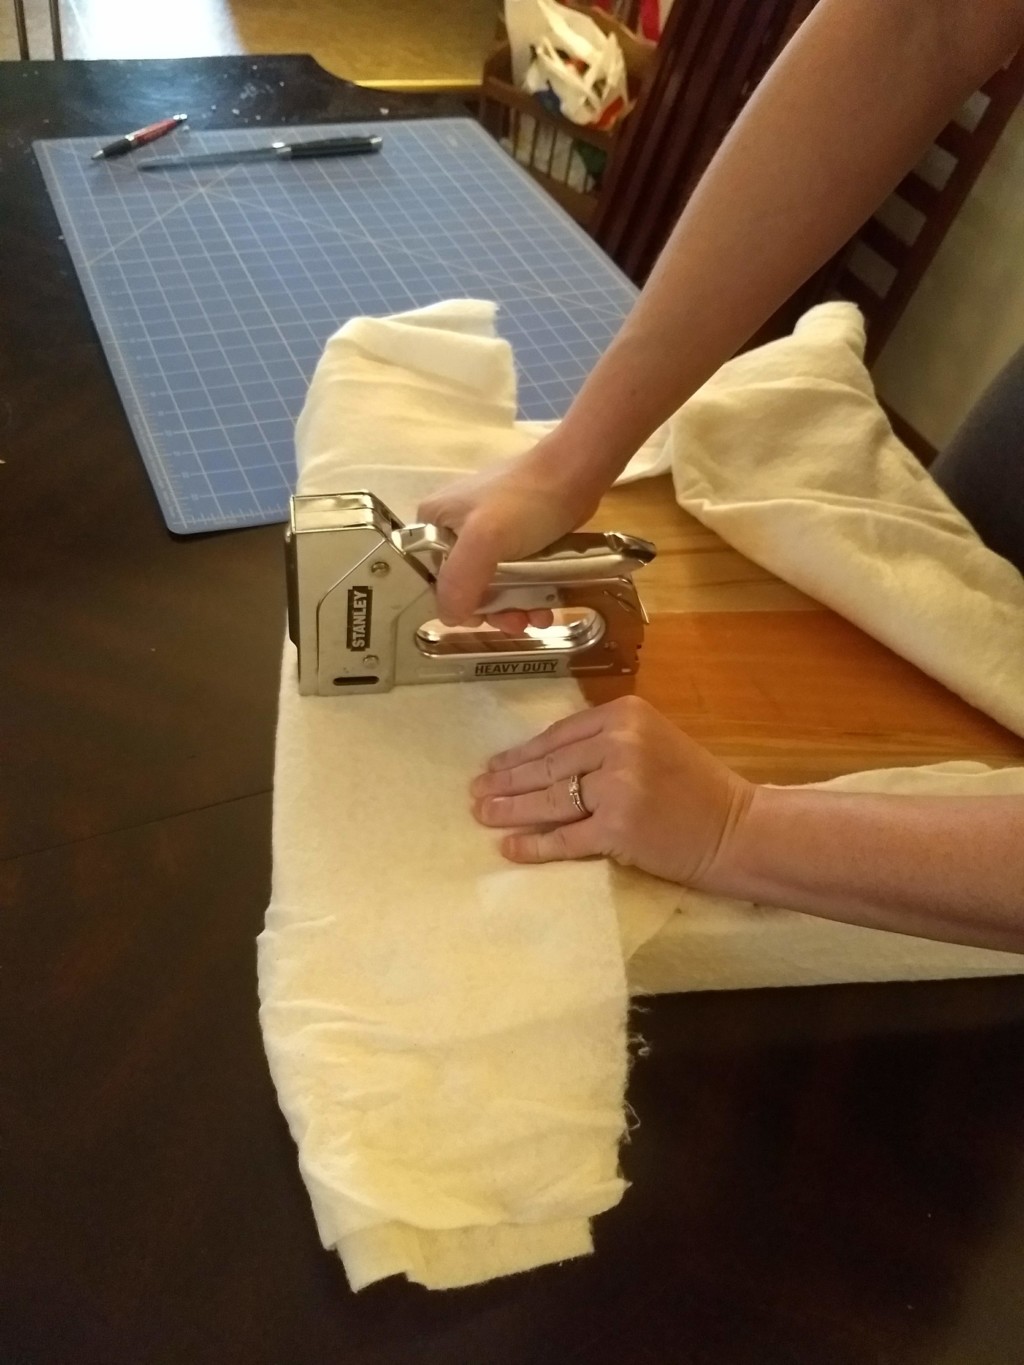
Start by putting one staple in the middle of each side. Smooth the front before each one. If you’re happy with the finished product, continue to staple toward the corners.
Ah, the corners. Those are a doozy.
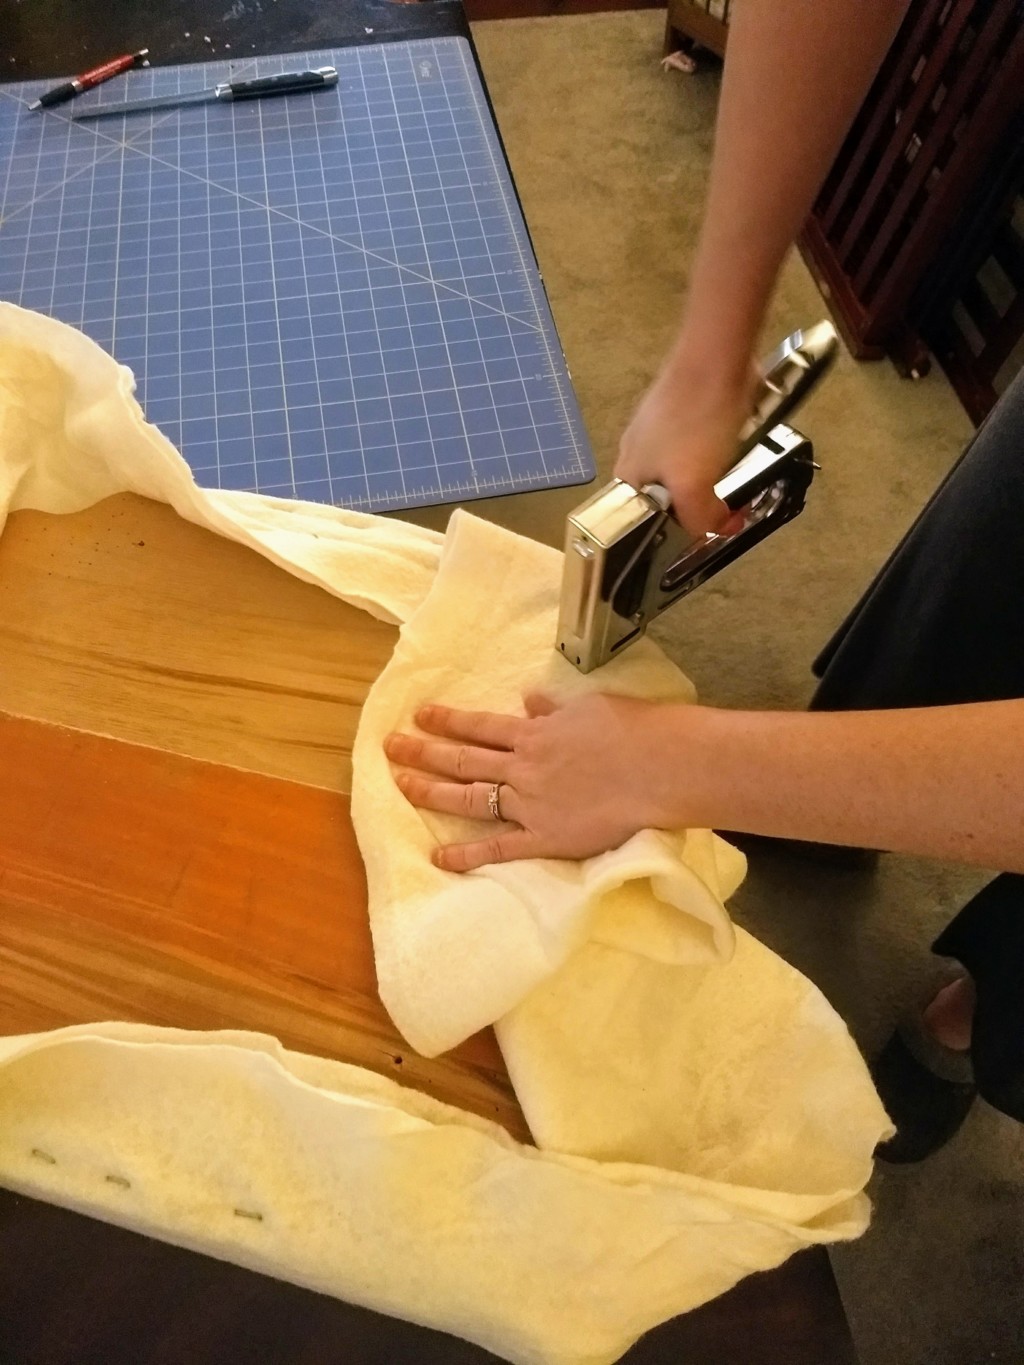
I saw an amazing video that advised pulling the corner tight first and then folding the corners over it. Unfortunately, I didn’t get any pictures of this process, but here is the finished product.
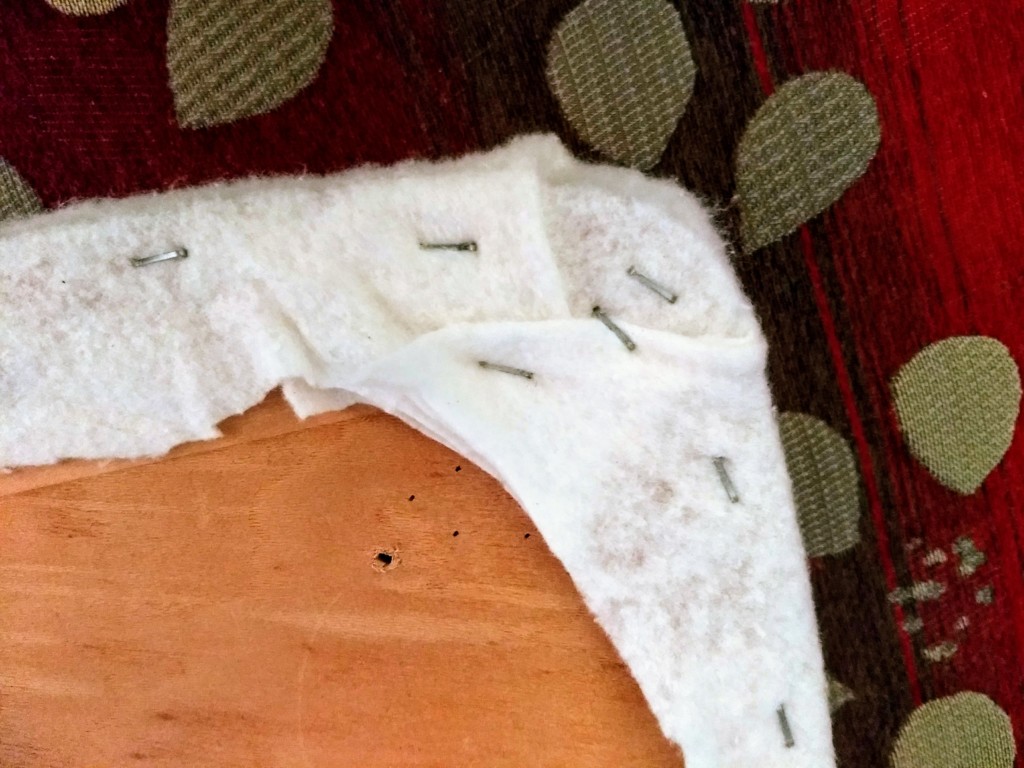
Trim off excess batting, and you’re ready to move on to the best part… the upholstery fabric you picked!
INSIDER TIP: If the screws that attach your seat to your chair are near the edge, be sure they are uncovered by the batting and fabric! You can see the hole in mine above.
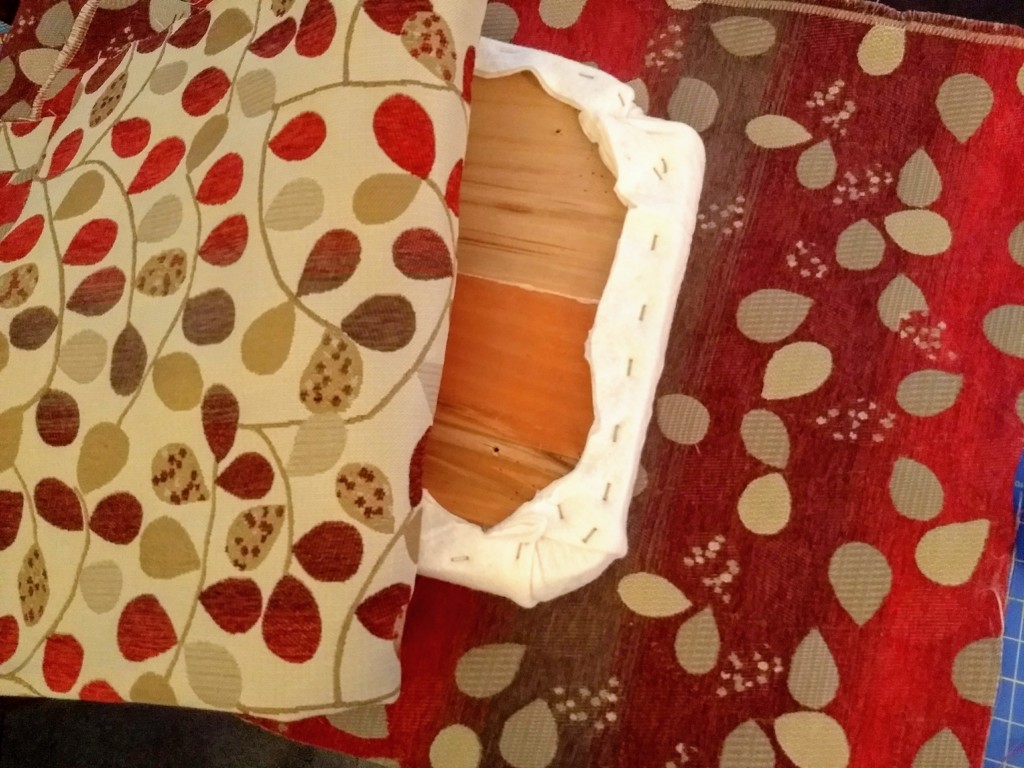
Step Five: You’re ready for fabric!
Now we’re to the exciting part! Hopefully you have already done your homework and chosen an appropriate upholstery fabric. There are several varieties to choose from, and I would like to warn you that unless your dining room chairs are pretty much purely for show, you want the heaviest, sturdiest upholstery fabric you can get. Some fabrics I loved were thin like regular fabric and were labeled “multi-purpose decor fabric” or, worse, “lightweight decor fabric.” I don’t know about your family, but mine includes three small terrors that will wreak havoc on those chairs, and the fabric needs to be the opposite of lightweight. I need fully-leaded fabric. And since I can’t use chain-mail to recover my seat, I found a good, sturdy upholstery fabric that feels like what you would find on a couch.
First you must make sure that if your fabric has a pattern, it is going the right way and it’s straight. Luckily, mine is very multi-directional, so this wasn’t a concern.
I trimmed mine down to a little bigger than I thought I needed, so I wasn’t moving around a monster piece of fabric. This is dangerous, though! Measure twice, cut once. You don’t want to have to go buy another yard of expensive fabric because you cut it too small.
Just like with the batting, administer one staple in the middle of each side, smoothing the front of the seat in between. Make sure everything looks right, then you can fill in more staples, leaving some room on the corners for your origami — er, pleating.
Back to the folding. Take a deep breath, and keep that screwdriver or multi-tool handy in case you mess up and need to remove a staple.
It’s a lot harder with fabric than with batting to pull the corner tight and then fold in the rest. Also, depending on your staple gun, you might not have very long staples, and going through lots of thick fabric is not easy.
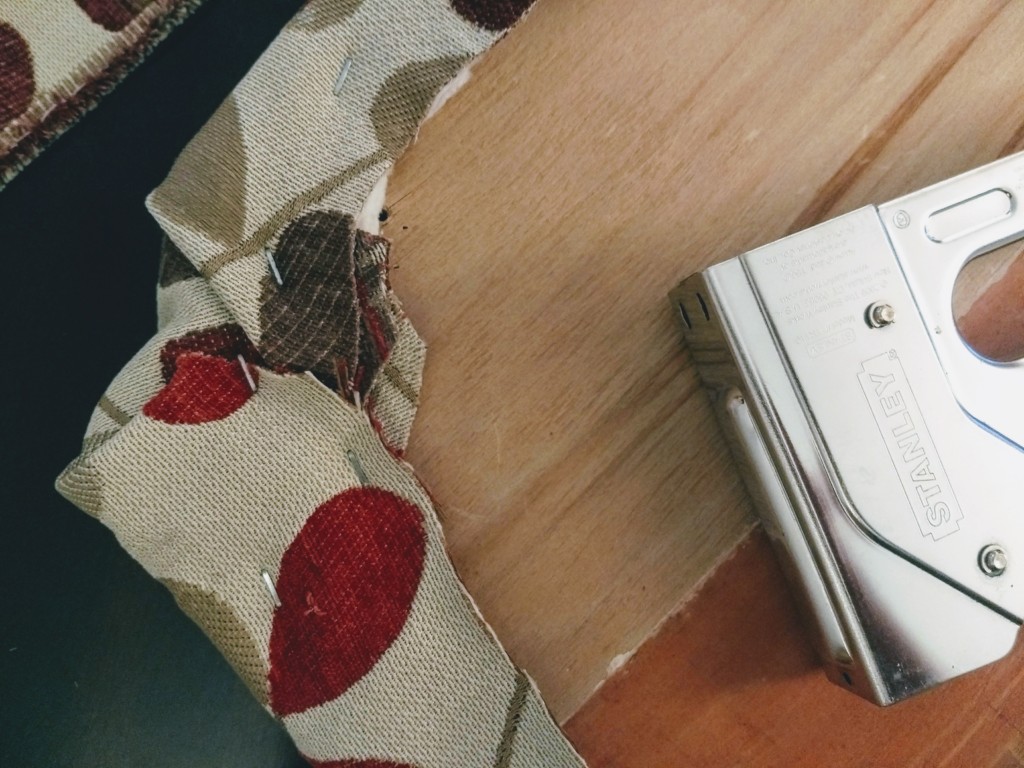
Two of the corners on my chair are kind of goofy. Thank goodness they’re up against the back of the chair, so it’s very forgiving.
Trim down the rest of the upholstery fabric when you’re done stapling.
There is an optional step, if your chair’s seat is only a wooden frame instead of a solid slab like mine. You can buy dust-cover material and make everything look professional before you put it back on. This is not something I did, but it’s covered in the YouTube video I posted a link to above.
Step Six: Scotchgard your seats so those little blessings that rule your roost don’t destroy them.
It’s winter and it’s freezing and consequently I haven’t gotten around to this step yet. I’m walking on the wild side and living on the edge, I know. But here is the finished product:
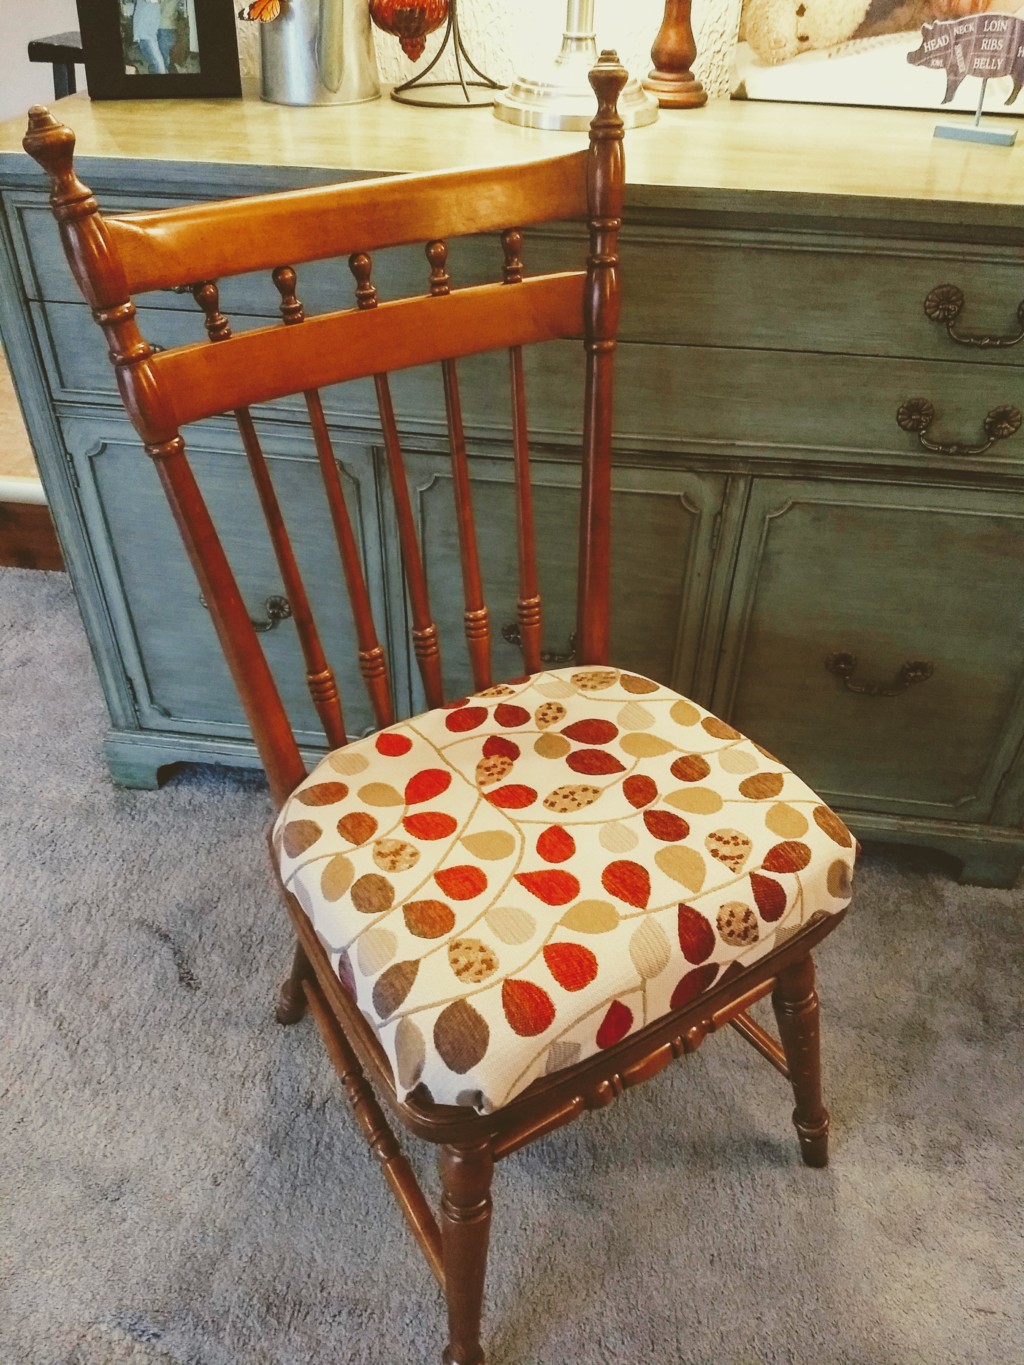
If Martha Stewart comes to my house she might wrinkle her nose at my amateurish job, but I’m happy with it!
Are you a Reupholstering Master? Share your tips and tricks below!
 Can’t Get Enough")


